 This week, I’ve showed you how to set up your home network and configure file sharing between PCs. In this guide, I’ll show you how to stream your media library from either Windows Media Player or iTunes.
This guide is part of the Home Network Setup, Sharing, Streaming, and Backup Series. Learn more about setting up a home network, configuring file sharing and streaming, and performing network backups on the series homepage.
Whether you use Windows Media player (WMP) or iTunes, this guide will help you stream your media to any PC in your home network. In this context, to stream means to view media (i.e. listen to music, watch a video) from one PC on another PC. This is particularly useful if you have all your music on your desktop but want to listen to it on your laptop.
Stream Your Media with Windows Media Player
To stream your media with WMP:
1. Get the latest version of WMP (this guide is written for version 12, which comes bundled with Windows 7.)
2. Make sure your PCs are in the same workgroup.
3. Open WMP, click Stream > Turn on media sharing…

4. When prompted, click Turn on media streaming.

5. Now go to another PC with the latest version of WMP. Open WMP and in the left hand column you will see your PC under “other libraries.”

NOTE: If you don’t see your library on other PCs or you cannot enable streaming, scroll down to Troubleshooting WMP Streaming Problems.
Stream Your Media with iTunes
To stream media with iTunes:
1. Download the latest version of iTunes (I used version 9.0.3 for this guide.)
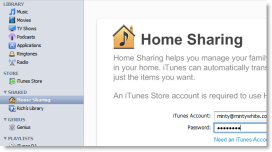
2. Open iTunes and click on Home Sharing in the left-hand column.
3. Type in your iTunes Store account details.

4. If you see the following error, you’ll need to authorize your account by clicking Yes.

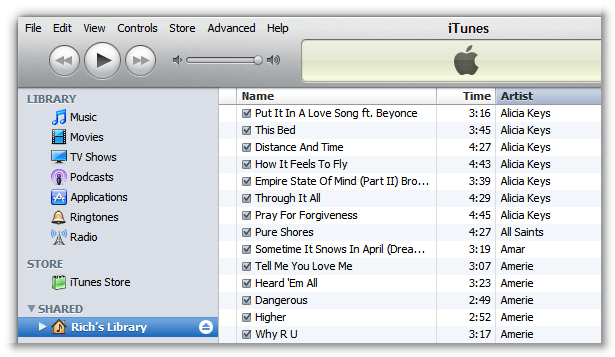
5. Now you can browse your libabry on other PCs using iTunes.

Troubleshooting WMP Streaming Problems
If you’re having problems with WMP media streaming, please take the following steps:
Make Sure Your Network is Configured as a Home Network (Vista/7)
In Windows Vista and 7, you’ll need to have your network configured as a Home network:
1. Click the network icon in the system tray and click Open Network and Sharing Center.

2. If your network shows, Public network, click Public network. If it does not, skip to the next step.

3. On the Select location screen, click Home network.

4. Try streaming again. If it still does not work, take the next troubleshooting step below.
Join Your Windows 7 PCs to a HomeGroup
If you’re using Windows 7 on more than one machine, a HomeGroup can save a lot of networking headaches.
To join your Windows 7 PC to a HomeGroup:
1. Open Control Panel and click on HomeGroup. If no HomeGroup exists, you’ll be prompted to create one and will be given a HomeGroup password.

2. Now go to your second Windows 7 PC and open Control Panel and click on HomeGroup.
3. Click Join now.

4. Type in the HomeGroup password you were given on your first PC.

5. If you want to share more or less from any PC, be sure to update the HomeGroup settings.

Still having problems getting streaming to work with either iTunes or Windows Media Player? Head to the forums for advice.
About Rich
Rich is the owner and creator of Windows Guides; he spends his time breaking things on his PC so he can write how-to guides to fix them.
- Web
- |
- |
- |
- |
- Google+
- |
- More Posts (1019)
Search Windows Guides